Stop wasting your paycheck on “pro-level” lighting kits and XLR mics before you’ve even hit the ‘Go Live’ button. I see these “how to stream on twitch” tutorials all over YouTube, and they’re almost always selling you a dream that requires a three-thousand-dollar rig just to avoid a blurry feed. Most of that advice is just marketing fluff designed to make you think you can’t start without a dedicated studio. I’ve spent enough time troubleshooting dropped frames and bitrate spikes to know that your setup is more likely to fail because of a bad encoder setting than because you don’t have a $500 camera.
I’m not here to give you a shopping list of gear you don’t need. Instead, I’m going to show you how to actually configure your software so your stream doesn’t look like a slideshow, and how to manage your hardware without choking your CPU mid-match. We’re going to talk real numbers—bitrates, frame timings, and actual stability—so you can focus on the game instead of staring at a buffering icon. No hype, no useless gear hauls, just the technical reality of getting your signal from your PC to the platform.
Table of Contents
Twitch Streaming Hardware Requirements That Actually Matter
Stop looking at the “recommended” lists on box art; they’re mostly garbage designed to make you overspend. When we talk about twitch streaming hardware requirements, the real bottleneck isn’t usually your GPU—it’s your CPU’s ability to handle the encoding without tanking your frame times. If you’re trying to play Valorant at 240Hz while simultaneously running an encoder, a mid-range Ryzen or Intel chip is the bare minimum. I’ve seen too many people buy a massive GPU only to realize their processor is choking the moment they hit “Start Streaming,” causing those micro-stutters that make a stream unwatchable.
Audio is the other silent killer. You don’t need a $400 studio setup, but if you’re using a headset mic that sounds like you’re underwater in a storm, nobody is staying. Finding the best microphone for streaming is more about managing your gain and background noise than the price tag. I’d rather see you spend fifty bucks on a decent USB condenser than two hundred on a fancy XLR setup you don’t know how to calibrate. Focus on the stability of your frames and the clarity of your voice—everything else is just vanity.
Finding the Best Microphone for Streaming Without Wasting Cash
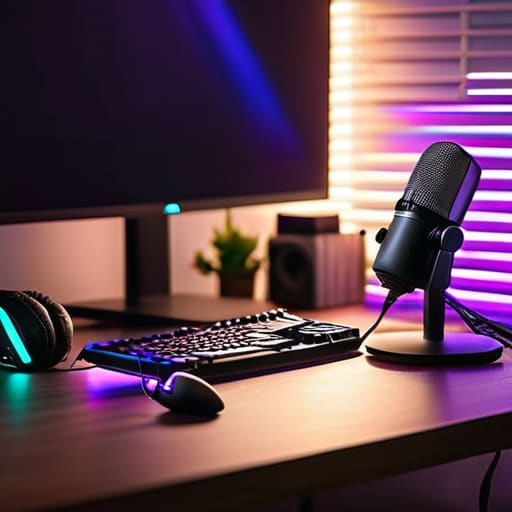
Look, you don’t need a $400 XLR setup and a soundproof booth to start. I’ve seen guys blow their entire budget on a Shure SM7B only to realize their room has the acoustics of a tiled bathroom, making them sound like they’re broadcasting from a cave. If you’re just starting, look for a decent USB condenser mic. It’s plug-and-play, meaning you can spend less time wrestling with audio interfaces and more time actually figuring out your twitch encoder settings so your stream doesn’t look like a slideshow.
The goal is clear audio without the “gamer” hiss. If you’re on a tight budget, a Samson Q2U is a solid middle ground because it gives you both USB and XLR options for when you eventually upgrade. Don’t get distracted by “streamer bundles” that include a cheap headset and a glowing keyboard; you’re better off buying a dedicated mic and a basic boom arm. Finding the best microphone for streaming is about signal-to-noise ratio, not how many RGB lights are attached to the stand. Get something that captures your voice clearly, and leave the rest of your cash for your GPU.
5 Ways to Stop Your Stream From Looking Like a 2005 Webcam Feed
- Stop chasing the 4K dream. Unless you’ve got a dedicated fiber line and a rig that isn’t sweating through its thermal paste, stick to 1080p at 60fps or even 720p. I’d rather see a crisp 720p stream than a stuttering, pixelated 1080p mess that drops frames every time an explosion happens on screen.
- Prioritize your upload speed over your download speed. I don’t care if you can download a 100GB patch in ten minutes; if your upload is choking at 3Mbps, your stream is going to look like a slideshow. Aim for at least 6-10Mbps of consistent upload headroom to keep your bitrate stable.
- Use an Ethernet cable. I’ve seen too many people try to stream over Wi-Fi and then wonder why their viewers are complaining about lag spikes. Even the best gaming routers have jitter; a $10 Cat6 cable is the cheapest way to stabilize your connection and stop the dreaded “dropped frames” warning in OBS.
- Don’t neglect your lighting. You don’t need a professional studio setup, but if you’re playing in a dark room with nothing but the glow of your monitor, you’re going to look like a grainy ghost. A cheap ring light or even a desk lamp bounced off a white wall will do more for your stream quality than a $200 webcam ever could.
- Watch your CPU usage, not just your GPU. If you’re running a heavy game and trying to encode video on the same processor, you’re asking for a crash. If you have an NVIDIA card, use NVENC encoding to offload that work to the dedicated chip on your GPU so your game frames stay steady while you broadcast.
The Bottom Line
Stop chasing the “pro” gear list; if your CPU can’t maintain a stable 60fps while encoding, a $400 mic won’t save your stream from looking like a slideshow.
Prioritize a dedicated capture card or a high-bandwidth Ethernet connection over fancy lighting, because viewers will forgive a dark room but they won’t forgive dropped frames.
Buy for the price you’re paying today, not the MSRP; look for used XLR setups or mid-range USB mics that actually deliver clean audio without needing a degree in sound engineering to set up.
Stop Chasing the Pro Setup
Most people think they need a thousand-dollar studio to go live, but the truth is your viewers won’t care about a fancy ring light if your bitrate is tanking and your audio sounds like you’re talking through a tin can. Get a decent mic, make sure your CPU isn’t choking on the encoder, and stop buying gear you can’t actually afford with your current sub count.
Denny Kowalczyk
Don't Overthink the Setup
Look, if you’ve followed this far, you already know the drill: you don’t need a liquid-cooled workstation and a studio-grade condenser mic just to hit your first ten followers. We’ve covered the essentials—getting your bitrate stable so your stream doesn’t look like a slideshow of 240p pixels, and picking a mic that actually captures your voice without sounding like you’re talking through a tin can. The goal isn’t to match the specs of a top-tier pro; the goal is to have a stable, readable broadcast that doesn’t crash your PC mid-match. Focus on the hardware that actually impacts the viewer’s experience, and stop chasing the gear treadmill before you’ve even hit the ‘Go Live’ button.
At the end of the day, people aren’t tuning in to see your RGB lighting or your overclocked GPU; they are tuning in to see you play. You can have the most expensive rig on the market, but if the energy is dead, the numbers won’t matter. Start with what you have, fix the audio issues as they come up, and just get into the rhythm of it. The technical side of streaming is just a means to an end—the real work happens in the game and in how you connect with the people watching. Now, quit reading my guides and go see if your upload speed can actually handle the load.
Frequently Asked Questions
Do I actually need a dedicated capture card if I'm just streaming from a single PC?
Short answer: No. If you’re running everything on one rig, a capture card is just an extra $150 sitting in a drawer collecting dust. You’re better off using OBS to grab your game window or display directly. A capture card is for when you’re pulling a signal from a console or a second PC to offload the encoding stress. Unless your single PC is already thermal throttling at 90°C while trying to play and encode, skip the card.
What bitrate should I set in OBS so my stream doesn't look like a pixelated mess of Minecraft blocks?
Stop chasing the “highest possible” number; if your bitrate doesn’t match your upload speed, your stream is going to choke. For a solid 1080p/60fps stream, aim for 6,000 kbps, but if you’re running 720p, drop it to 4,500 kbps. If you try to push 8,000 kbps on a shaky connection, you’re just asking for frame drops. Check your upload speed on Speedtest first, then leave about 20% of that headroom for your actual gaming.
Is it worth buying a Stream Deck, or can I just map my macros to a cheap numpad?
Look, if you’re just mapping “Mute” or “Scene Change” to a cheap $10 numpad, you’re fine. It’s basic macro work. But the Stream Deck isn’t just a glorified keypad; it’s the visual feedback that stops you from panicking when a transition fails. If you have the budget, the tiny LCD icons save you from hunting for keys mid-clutch. If you’re on a budget, get the numpad, map your hotkeys, and save the extra $150 for a better GPU.
