I was mid-match in a ranked session last week when my GPU fans suddenly spiked to 100%, sounding more like a jet engine than a cooling system, only for my frames to tank from a stable 144fps to a stuttering 45fps. It wasn’t a driver issue or a bad patch; it was a literal carpet of dust choking my heatsink. Most people think they need a professional technician or a ridiculous kit of specialized brushes to fix this, but learning how to clean a pc is actually pretty simple if you stop overthinking it. You don’t need to spend fifty bucks on “anti-static” gimmicks that are mostly just marketing fluff; you just need to know which parts are actually sensitive and which ones just need a good blast of air.
I’m not going to give you a generic checklist that tells you to “be careful” without explaining why. Instead, I’m going to show you exactly how I strip down a rig to keep my temps low and my performance consistent. We’ll cover the right way to use compressed air so you don’t shred your fan bearings, how to handle thermal paste without making a mess, and the specific tools that are actually worth your money. No fluff, just the practical steps to make sure your hardware isn’t throttling because you were too lazy to grab a can of air.
Table of Contents
Guide Overview
Tools & Supplies
- Compressed air canister for blowing out dust
- Soft brush or makeup brush for loosening stubborn grime
- Microfiber cloth for wiping surfaces
- Isopropyl alcohol (90% or higher) 1 bottle
- Cotton swabs 1 pack
Step-by-Step Instructions
- 1. First things first: kill the power. Don’t just hit the sleep button or shut down Windows; flip that switch on the back of the PSU and unplug the damn cord from the wall. If you’re working on a laptop, disconnect the battery if it’s even remotely possible. I’ve seen too many people fry a motherboard because they thought “off” was enough, but static or a stray current can turn your $500 GPU into a very expensive paperweight in a heartbeat.
- 2. Get yourself a workspace that isn’t your bed or a carpeted floor. You want a hard, flat surface—a wooden desk or a kitchen table is fine—and if you really want to be safe, grab an anti-static mat. If you’re like me and didn’t plan ahead, just make sure you aren’t wearing those fuzzy socks that generate a static charge every time you move. You want to minimize the risk of zapping your components before you even touch a screwdriver.
- 3. Grab your toolkit. You don’t need a professional technician’s kit, but you do need a decent Phillips head screwdriver and, most importantly, compressed air. Do not—and I mean never—use a vacuum cleaner directly on your components. Vacuums build up massive amounts of static electricity at the nozzle, and that’s a one-way ticket to a dead system. If you don’t have canned air, get a dedicated electric duster; it’s a better investment in the long run.
- 4. Open the side panel and let’s look at the damage. Most of the junk is going to be clumped in the fin stacks of your heatsinks and caught in the mesh of your fan filters. Take your compressed air and give the fans a quick blast, but here is the pro tip: hold the fan blades still with your finger while you spray. If you let the air spin the fans at high speeds, they can actually act like tiny generators and send a voltage spike back into your motherboard, which is a nightmare scenario.
- 5. Focus on the heavy hitters: the GPU and the CPU cooler. These are the parts that actually determine if your frame rates stay stable or if your system starts thermal throttling halfway through a session. Use short, controlled bursts of air to blow the dust out of the radiator fins. If you see “dust bunnies” that are actually stuck to the metal, you might need a soft-bristled brush to gently loosen them before blowing them away.
- 6. Don’t forget the “hidden” spots like the bottom of the case and the IO shield area. If you have a lot of cables, the dust loves to hide in the cable management channels behind the motherboard tray. Clear that out too, because airflow isn’t just about the fans blowing air in; it’s about giving that air a clear path to exit the case without hitting a wall of grime.
- 7. Once everything looks clean and the dust has actually settled, put it all back together. Before you plug it back into the wall, do a quick visual check to make sure you didn’t leave a screw rolling around on the motherboard or a loose cable hanging near a fan. Plug it in, boot it up, and check your temps using something like HWMonitor or MSI Afterburner. If your idle temps are lower than they were before you started, you actually did it right.
Cleaning Computer Components Safely Without Killing Your Hardware
First things first: stop treating your internals like a kitchen counter. If you’re grabbing a wet rag or a generic household spray, put it down. When it comes to cleaning computer components safely, your best friend is high-percentage isopropyl alcohol for electronics—I’m talking 90% or higher. Anything less carries too much water and risks leaving a conductive residue that’ll turn your expensive GPU into a very shiny paperweight. Use it sparingly on a lint-free microfiber cloth or a specialized swab to wipe down contacts, but never soak anything.
Also, let’s talk about the invisible killer: static. I’ve seen too many people grab a cheap synthetic brush and accidentally fry a motherboard. Focus on static electricity prevention pc cleaning by working on a hard surface—not carpet—and if you can, use an anti-static wrist strap. If you’re feeling brave enough to go deeper, like a pc thermal paste replacement, make sure you’re cleaning the old crusty stuff off the die with that alcohol first. If you don’t get a clean surface, you’re just trapping heat under a new layer of goop, which completely defeats the purpose of the maintenance.
Preventing Pc Overheating by Cleaning Pc Case Filters
If you’re only cleaning the guts of your rig and ignoring the mesh, you’re just fighting a losing battle. Most people forget that those front and bottom intake filters are the first line of defense, and once they’re choked with lint, your fans have to spin twice as fast just to move half the air. I’ve seen builds where the GPU is hitting 85°C on a mild day simply because the dust buildup on the filter was acting like a literal wall. Preventing PC overheating starts with making sure your fans actually have something to breathe.
Don’t just vacuum them through the mesh like a maniac; you’ll likely just push the grit deeper into the fine holes. Pop them off—most modern cases make this easy with magnetic clips or simple tabs—and rinse them under a lukewarm tap if they’re plastic. Just make sure they are completely bone-dry before you snap them back in. If you’ve got those fine, fabric-style filters, a quick pass with a soft brush is better. It’s a five-minute job that keeps your temps from spiking and saves you from having to worry about more intensive tasks like pc thermal paste replacement much sooner than you actually should.
Five Ways to Avoid Turning Your Rig into a Paperweight
- Unplug everything before you touch a single screw; static or a stray current from a live PSU is the fastest way to turn a $500 GPU into a very expensive doorstop.
- Ditch the vacuum cleaner; those things build up massive amounts of static electricity that will fry your motherboard the second you get close to the traces.
- Hold your fans steady with a finger or a zip tie while you’re blowing them out; if you let them spin freely from the compressed air, they’ll act like tiny generators and send a voltage spike right back into your components.
- Use 90% or higher isopropyl alcohol for any stubborn grime on contact points; anything less is just leaving moisture behind that’ll cause corrosion while you’re busy trying to play something.
- Don’t go overboard with the canned air; short, controlled bursts are fine, but if you hold the nozzle down too long, the liquid propellant can freeze and crack your delicate PCB traces.
The Bottom Line
Stop waiting for your fans to sound like a jet engine before you act; if you’re seeing thermal throttling or a 10% drop in your average FPS, it’s time to grab the compressed air.
Never use a vacuum or a wet cloth on the internals—you aren’t cleaning a kitchen counter, and static discharge or moisture is the fastest way to turn a $500 GPU into a paperweight.
Clean your case filters every time you do a deep clean; it’s the easiest way to keep your airflow consistent and prevent your components from cooking themselves under load.
## The Cost of Neglect
“I’ve seen too many people spend three grand on a GPU only to watch it throttle because they were too lazy to blow the lint out of a filter. You aren’t saving time by skipping maintenance; you’re just paying a ‘dust tax’ in the form of lower frame rates and shorter component life.”
Denny Kowalczyk
Don't Let Your Rig Rot
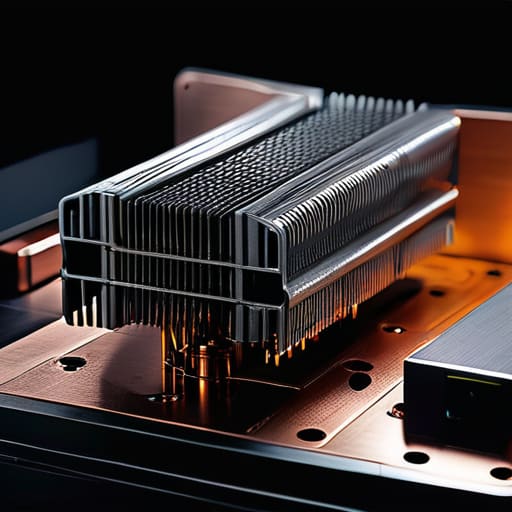
Look, we’ve covered the essentials: clear the dust out of those intake filters, use compressed air instead of a vacuum that’ll fry your motherboard with static, and actually take the time to clean the components themselves rather than just blowing dust around. If you follow these steps, you aren’t just making the inside of your case look pretty for a photo; you’re preventing thermal throttling that kills your frame rates. I’ve seen too many builds where the GPU clocks drop 20% because the heatsink was packed with felt-like dust, turning a high-end machine into a glorified space heater. Clean hardware is stable hardware, and stability is the only thing that matters when you’re mid-raid or trying to hit a personal best.
At the end of the day, your PC is an investment, not a disposable appliance. You wouldn’t let your car’s engine clog up with sludge and wonder why it won’t hit sixty, so don’t treat your silicon any differently. Taking thirty minutes every few months to maintain your setup is the cheapest performance upgrade you will ever find. You don’t need to spend another thousand dollars on a new cooling solution if you just stop letting the junk build up in the first place. Get it done, get it clean, and get back to actually playing your games.
Frequently Asked Questions
Is it actually safe to use a vacuum cleaner on my motherboard, or am I just asking for a static discharge to fry my GPU?
Absolutely not. Do not touch your motherboard with a vacuum. You aren’t just risking a static discharge; those plastic nozzles are static magnets, and one tiny spark from a high-voltage carpet cleaner is all it takes to pop a capacitor or fry your traces. If you want the dust gone, use compressed air or a dedicated electric duster. Keep the vacuum for the floor; keep it away from your silicon.
How often do I actually need to do this—are we talking once a month or once a year?
Look, if your PC is tucked under a desk in a carpeted room, you’re basically running a vacuum cleaner in reverse. Check your dust filters once a month; if they’re choked, clear them. For the actual internals, aim for every six months. If I see a build where the GPU fans are fighting a losing battle against a felt layer of grey fuzz, I know that person hasn’t opened their case in a year.
If I've already got thermal paste looking like a dried-up mess on my CPU, does cleaning the dust even matter?
It matters, but it’s only half the battle. If your thermal paste looks like cracked desert mud, your temps are going to stay high regardless of how clean your fans are. Dust acts like an insulator, trapping heat against the components, but old paste stops the heat from actually leaving the chip. Clean the dust to let the air flow, then repaste immediately. If you don’t do both, you’re just wasting your time.
