I was mid-raid on a Tuesday night, trying to focus on a boss mechanic, when my rig decided to sound like a Boeing 747 preparing for takeoff. I didn’t need a $200 liquid cooling loop or a brand-new case to fix it; I just needed to stop believing the marketing fluff that says “more fans equals silence.” Most of the “solutions” you see online are just ways to get you to spend more money on hardware you don’t actually need. If you’re searching for how to reduce fan noise, you’re probably tired of the expensive, overcomplicated nonsense that ignores the actual physics of your build.
I’m not going to give you a list of “top ten” products to buy. Instead, I’m going to show you what actually works when you stop looking at the spec sheet and start looking at the actual decibels. I’ve spent years tearing down builds and adjusting curves until the noise floor dropped without my CPU hitting 95°C. I’ll show you how to undervolt, how to fix your fan curves, and how to spot a cheap, rattling bearing before it ruins your concentration. No hype, no filler—just the real numbers and the settings that actually work.
Table of Contents
- Cleaning Dust From Heatsinks Before You Throw the Pc Away
- Adjusting Pwm Fan Settings to Stop the Constant Whining
- 5 Ways to Stop Your PC From Sounding Like a Jet Engine
- The Bottom Line on Silencing Your Rig
- The Myth of the "Silent" Build
- The Bottom Line on Your Build's Noise
- Frequently Asked Questions
Cleaning Dust From Heatsinks Before You Throw the Pc Away
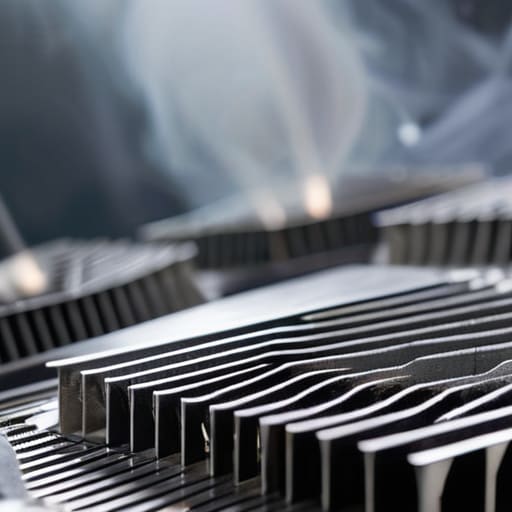
Before you decide your rig is just a loud, expensive space heater and start browsing for a new one, check the fins. I’ve seen way too many people assume their GPU is dying when it’s actually just suffocating. When you’re cleaning dust from heatsinks, you aren’t just making it look pretty; you’re clearing the physical barrier that’s forcing your fans to spin at 100% just to keep the silicon from melting. I pulled an old build out of a friend’s closet last week—it was pulling 3200 RPM on the CPU fan just to idle at 55°C. A quick blast of compressed air through the radiator fins brought that idle down to 38°C and dropped the noise floor significantly.
If you’re still hearing that high-pitched whine after a cleaning, look deeper. Dust often gets packed into the tightest corners where air can’t move, which is basically reducing thermal throttling‘s biggest enemy. If the dust is caked on like concrete, don’t just blow air at it; you might need to actually pop the cooler off and clear the gap between the heat pipes and the fins. It’s a ten-minute job that saves you a three-hundred-dollar headache.
Adjusting Pwm Fan Settings to Stop the Constant Whining

If cleaning the dust didn’t work, the problem is likely your fan curve. Most motherboards ship with a “standard” profile that’s tuned for extreme safety, meaning your fans ramp up to 100% the second your CPU hits 50°C. It’s overkill. I spent an hour in the BIOS of my last build adjusting PWM fan settings just to stop the constant oscillation between “silent” and “jet engine.” You want a stepped curve: keep the RPMs low and steady until you actually hit a thermal threshold that matters, like 70°C, then let them ramp up.
Don’t just chase silence, though. If you flatten the curve too much to avoid the whine, you’ll end up reducing thermal throttling by accident—or rather, failing to prevent it. I tested a build where the user set the fans so low they stayed quiet, but the GPU hit 85°C under load and the clock speeds tanked. You need to find the sweet spot where you’re optimizing airflow for cooling without turning your desk into a wind tunnel. Aim for a steady, predictable hum rather than a fan that constantly changes pitch every thirty seconds.
5 Ways to Stop Your PC From Sounding Like a Jet Engine
- Check your fan curves in the BIOS or via software like Fan Control; if your fans are ramping up to 100% just because you opened a Chrome tab, your voltage curve is set way too aggressive for your idle temps.
- Swap out those cheap, stock case fans for something with actual decent bearings; I’ve replaced generic 120mm fans with Noctua or Be Quiet! units and seen a drop from 45dB to a barely audible 22dB without losing a single frame.
- Fix your cable management because if a wire is physically touching the fan blades, you aren’t dealing with air turbulence—you’re dealing with a rhythmic clicking that’ll drive you insane during a boss fight.
- Add more intake/exhaust points if your internal temps are hitting 80°C+ while idling; if the air can’t move, the fans will spin faster to compensate, creating a feedback loop of noise that doesn’t actually cool anything down.
- Undervolt your GPU; it sounds technical, but it just means feeding your graphics card slightly less voltage to get the same clock speeds, which drops the heat output and stops those triple-fan shrouds from screaming at 2000 RPM.
The Bottom Line on Silencing Your Rig
Don’t just blast compressed air at the case; if you don’t actually clear the gunk out of the heatsink fins, your fans will just spin faster to compensate for the heat, making the noise problem worse.
Stop accepting the factory fan curve as law; go into your BIOS or use software to set a custom PWM profile so your fans aren’t ramping up to 100% every time you open a Chrome tab.
If you’ve cleaned the dust and tuned the curves but it still sounds like a jet engine, your bearings are likely shot—at that point, stop wasting time and just buy a replacement fan.
The Myth of the "Silent" Build
“I’ve seen enough spec sheets claiming ‘ultra-quiet operation’ to know they’re lying; if your fans are ramping up to 1800 RPM just to keep a mid-range GPU from melting, no amount of marketing fluff is going to save your ears—you either fix the airflow or you accept the jet engine.”
Denny Kowalczyk
The Bottom Line on Your Build's Noise

Look, if your PC sounds like it’s trying to achieve lift-off every time you launch a heavy title, you don’t necessarily need to drop $300 on a new case or a liquid cooling loop. Most of the time, you’re just dealing with a buildup of dust choking your heatsinks or a BIOS that’s set to an aggressive, unoptimized fan curve. I’ve spent enough nights troubleshooting builds to know that a quick blast of compressed air and a five-minute dive into your PWM settings can save you more headache than a hardware upgrade ever will. Don’t let a loud, unoptimized fan profile ruin your immersion or make your desk feel like a construction site; fix the airflow and tune the software before you start reaching for your credit card.
At the end of the day, your hardware should serve your gaming experience, not distract from it. There is nothing worse than being mid-raid or deep in a story beat only to have your concentration shattered by a high-pitched whine from a cheap bearing or a thermal throttle loop. Build it smart, maintain it regularly, and actually listen to what your machine is telling you. You don’t need a perfect, silent rig—that’s a myth—but you do deserve a machine that runs predictably. Get the numbers right, get the noise under control, and then get back to actually playing the games you bought the hardware for.
Frequently Asked Questions
If I turn the fan curves down to make it silent, am I actually going to throttle my GPU during a heavy session?
Short answer: Yes, you probably will. If you flatten your curve to keep it silent, your GPU is going to hit its thermal limit and start downclocking to save itself. I tested this on a 3070; I dropped the fans to a static 30% to kill the whine, and within ten minutes, the clock speeds tanked from 1900MHz to 1450MHz. You aren’t just getting silence; you’re getting a slideshow. Find the middle ground.
Is it worth buying those expensive anti-vibration rubber mounts, or is the noise coming from the case itself?
Don’t waste your money on those rubber mounts yet. I’ve seen people drop thirty bucks on fancy silicone grommets only to realize the vibration was coming from a loose side panel or a poorly seated HDD.
Can I just swap out my stock fans for Noctua ones, or am I going to run into header issues on my motherboard?
You can, but don’t just buy the most expensive brown fans and hope for the best. Check your motherboard manual first. If you’re looking at a budget board, you might only have one or two PWM headers, and a three-fan setup will need a splitter or a dedicated fan hub. Also, watch the clearance; some massive air coolers won’t play nice with thicker aftermarket fans. Check the header amperage too, or you’ll fry something.
